July 10, 2020

The Four Funerals

I wrote this in 2014. It took me almost six years to publish this. I dunno why I didn't publish this earlier.. I should write down all my memories here before I forget them. I dont ever want to forget them.

........

My first time experiencing funeral happened when I was 10. It was my grandfather's. I remember waking up in the middle of night, watching my mom sobbing hard in the kitchen, tightly hugged by my dad. As a kid, that particular moment didn't mean anything much to me. Seeing my mom crying hard like that had me thinking, what's going on here, should I perhaps be crying too? We went back to my grandparent's house that night, and I recalled seeing my Atok's body, lying cold in what had been a place for me and siblings sleep every time we went back to kampung, a middle room between serambi and the back hall. My Atok passed away due to a deadly snakebite. According to my uncle, they both went for a fishing trip, and it happened when he was trying to 'scoop' the fishes with his 'nyiru' basket, when the snake came out of nowhere and bit him. 

It all happened in the month of Ramadan. And all he wanted was just to catch some fish for buka puasa, and little did he knew that those fishes that he piled in that big, red pail were used for his own kenduri tahlil :( And the most part that I couldn't forget were those moments before he was buried. Everyone who knew him left sorrowful pecks on his cheeks as goodbyes, and I remember my confused self refused to do so. I don't know... but I guess being ten is one of the reason why. 

Skipping to a couple of years ahead, came my second funeral encounter. It was my grandfather's mother, my moyang. I remember her fair, bright face and small, almost nenek kebayan-figure. She passed on because of her age which some said closer to being a centenarian, wallahualam... I remember seeing my first kapan process (as a muslim, it's compulsory for us to clean the deceased and wrap him/her in a long piece of white cloth before we sent them for burial) Again, I didn't cried at that time because, honestly, I admit that I felt embarrassed to show that kind of emotions to the crowd. A big dusssh to the blunder old-me.

My third funeral was my Uncle's. He was my only uncle that I really felt close to (on my father's side). He had a heart attack. I was in my uni years (the event actually took place about eight years after the last funeral I've attended). I remember waiting my dad in my uni lobby, with my friends, ready for Penang. And I still remember the cold silence and sight of sadness on each corner, once I reached there. I could see his body in the middle of the hall, covered in white piece of cloth, circled with closed relatives, in a hot and compact room, filled with people all over the place. I politely make my way into the crowd to reach him. His face was calm. Said my goodbye to him, salam few relatives there and ended up in my aunt's hug. I cried this time... He showed plenty of kindness toward me and my siblings every time we went back to Penang. I could never ever forget him.

It was a long period of time before my fourth funeral encounter came. And it happened on the last day of 2013. First January 2014. Little did I know that I would start my new year with such heartache news. It was my aunt, my one and only Mak Andak. My first funeral as a grown-up. Probably the hardest and longest weep I've ever done in my life. There's a particular kind of sadness, different from the one I had in previous funerals... it's hard to explain it here. I still sob for her to this day. I just couldn't believe that she's no longer with us... she's the only Aunt that I'm closest to on my mother's side. 

"Kita buat dia" was her way of saying that nothing is impossible, everything can be fixed. I love her caring, motherly side.. her jokes, and she not pretentious.. and I like her name-Julia. May she rest in peace in her slumber world now. I always pray for you, Mak Andak, till today. May we see each other soon on the good side one day k, Amin. 


Every soul will taste death (3:185) 


Paris: Muséum national dhistoire naturelle

November 2013.

This was taken six autumns ago. We were on our way to Museum National D'histoire Naturelle from Paris Mosque, where we just had our mint tea and exquisite Turkish delights. It has been a sort of our family tradition to visit a natural history museum whenever we were travelling. Adam loves anything related to pre-historic stuff, and I don't have any objection to that because I loved geeky stuffs too.

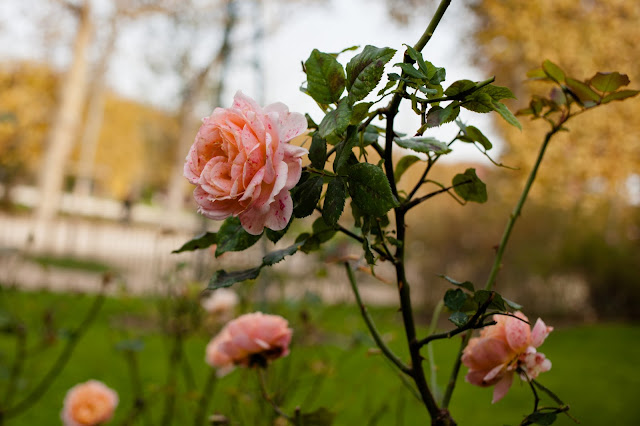
We slowly made our way through Jardin des Plantes, admiring the various, lovely hues of pink, peach to red and brown. My mom was all smiling. The garden has not lost its charm during our visit, even though fall season was fading away. They were all looked ready for their long winter nap anytime soon. 

Anyway, I wore my first pair of boot for this trip, with a green parka army jacket that I've been wanting to get to so badly. Finally found it in Stuttgart, in my size, a week before coming here. I was pleased with both items, the jacket at least. The wide feet boot finally shown its defiant side after miles of walking. I bought it online from Anthropology. It's still in the store in case I get to roam around in foreign land someday. 

I wrote the above in 2015, three years after our trip with my mom to Paris. I don't want to wait for the perfect caption, I just want to post this so I could remember this moment exactly as it is. 

Would give anything to be able to travel again. Especially with my parents and family. Soon, after all this Covid-19 is over. Amin.

November 12, 2015

Thai Milk Tea Crepe Cake

A crepe cake for my husband's birthday.Yay, finally made one. It was an impromptu attempt. I had no idea of what to bake for him this year. Made him a croquembouche tower last year, and had to find something to beat that, yikes. I finally settled with a crepe cake minutes before midnight, hoping the whole crepe-making process would bring me the same challenge. I know, to some, this is not a cake. Having those layers made it half into being a cake. But who cares. As long as I can stick a candle on it, a cake it is then. Well, I happened to sample a nice crepe cake in Japan. In Shin-Yokohama, to be exact. Somewhere near the Ramen Museum. Perfect weather; a slice of chocolate crepe cake partnered with a heart-shaped latte, and a well-behaved boy next to me, enjoying his hot chocolate.*wink* I gave chocolate some break this time, and pursued this cake with Southeast Asian twist-Thai Milk Tea. Stood up 30 minutes for that thin crepes. Love the quite joy I had while preparing those layers; drop a ladle of batter, quickly swirl the pan, let it dry, flip, remove and repeat. Without that particular kid's screaming, it was heaven and yeah, I'd probably do it again. As for the pastry cream, I'm not quite happy on how it turned out; it was me, not the recipe. Some of the ingredients were poorly substituted, resulting a bit lumpy texture, rather runny than my usual cream. But it escaped the bin and made it as a cake. The topping was crème de la crème! I can't even... It was so tasty I couldn't keep my finger off of it. Assembling the cake was easy. Made a time-lapse video of it. Watch it below. 

Thai Milk Tea Crepe Cake
Adapted from Iron Chef Shellie-Thai Milk Tea Crepe Cake

Crepes
4 large eggs
360ml milk
240ml water
300g plain flour
6tbs melted butter
Butter, for coating the pan

Pastry Cream
3 Thai Milk Tea tea bags
120ml boiling water
420ml milk
6 egg yolks
150g caster sugar
55g corn-flour
1 vanilla bean split (or 1 teaspoon vanilla bean paste)
pinch salt
1 leaf gold strength gelatine

Drizzle Sauce
3 Thai Milk Tea tea bags
120ml boiling water
420ml milk
6 egg yolks
150g caster sugar
55g corn-flour
1 vanilla bean split (or 1 teaspoon vanilla bean paste)
pinch salt

Assembly and To Serve
400g whipped cream
fresh mint, to serve

For the crepes:
In a blender, combine all of the ingredients and pulse for 10 seconds. Place the crepe batter in the refrigerator for at least 1 hour. (This allows the bubbles to subside so the crepes will be less likely to tear during cooking.) The batter will keep for up to 48 hours.

Heat a small non-stick pan. Add butter to coat. Pour 2-3 tbs of batter into the center of the pan and swirl to spread evenly. Cook for 30 seconds and flip. Cook for another 10 seconds and remove to the cutting board. Lay them out flat so they can cool, you can stack the crepes, they will not stick to each other.

Continue until all batter is gone. After they have cooled you can store the crepes in sealable plastic bags in the refrigerator for several days or in the freezer for up to two months.

For the Thai milk tea pastry cream:

In medium bowl, whisk together 120ml Thai milk tea, egg yolks, 75g sugar, and cornstarch.

Transfer the remaining Thai milk tea to heavy medium saucepan. Scrape in seeds from vanilla bean and the seed and the pod to the pan and add the salt. Sprinkle the remaining sugar over, letting sugar sink undisturbed to bottom. Set pan over moderate heat and bring to simmer without stirring.

Whisk hot milk mixture, then gradually whisk into egg yolk mixture (this is called tempering). You want to do this slowly or you will have scrambled eggs.

Return to saucepan over moderate heat and cook, whisking constantly, until pastry cream simmers and thickens, about 1 minute. Remove from heat, discard vanilla pod, and whisk cream until smooth. Transfer to bowl and press plastic wrap or parchment directly onto surface. Chill until cold, about 4 hours. (Pastry cream can be made ahead and refrigerated, wrapped well with plastic wrap or parchment on surface, up to 3 days.)

For the Thai milk tea drizzle sauce:
Follow the steps as above for the pastry cream, except cook for a little longer to make it thicker. Be sure to keep whisking to ensure you don’t end up with lumpy bits down the bottom. I found whisking then transferring to a large mixing bowl, then back into the saucepan a few times to be really helpful.

Assemble the cake:
Soak gelatine leave in cold water for about 15 minutes.
Use the base of an 18cm cake tin as a template to trim the crepes to size. Then line the base and sides of the tin, ready for assembly.
Place one crepe in the cake tin. Spread one tablespoon of pastry cream evenly over the crepe. Lay your next crepe on the bench or a plate and spread evenly with one tablespoon of whipped cream. 

Carefully pick it up and lay it over the crepe in the cake tin, cream side down. Continue with pastry cream and whipped cream until the final crepe has been added. Or until around 13 layers high.
Squeeze excess water from the gelatine leaves, add to the remaining pastry cream and gently heat and stir over a stove until gelatine is dissolved. Pour this on top of the crepe cake and smooth the top.
Chill the cake for 2 hours or overnight to firm up.

The recipe is copied from Iron Chef Shellie's blog. Her Thai Milk Tea Crepe cake is seriously impressive. Click the link for more exciting recipes from her blog. :)


A video posted by Faizah {Ribbon&Circus} (@ribboncircus) on


October 6, 2015

Sambal Ikan Bilis Buns ( using Tangzhong Method)


I'm not happy this week photos.  Note the out of focus, bad lighting photos-yes, three almost similar photos up there. The buns are relatively good, despite the after-baked meh look. Soft. They are pillowy-soft. And who can say no to sambal ikan bilis? Sweet, salty and spicy. Reminds me times I had in Bintulu where Gardenia's Ikan Bilis bun were the most sought-after souvenirs from the Peninsular. I never bought one for my colleagues though. Sorry guys, I couldn't find them. Which part of KLIA is selling it again? Anyway, most of the recipes I googled call for bread improver. I couldn't find a halal one here, so I pursued with the Tangzhong method. Result as discussed above. Pillowy-soft. I believe everyone is already familiar with this method. No further explanation needed. This will be my go-to sambal ikan bilis bun. Might have to repair the looks somehow. 

Sambal Ikan Bilis Buns. 
Soft Buns recipe is taken from Kokken69's Yukone Method Sweet Soft Buns

Water Roux
50g Bread Flour 
75g Boiling water 

Mix water roux ingredients together in a bowl. 
Cover bowl with cling wrap and store in fridge for 12 hours.

Bread Dough
6g Active Dry East 
160g Bread Flour 
40g Plain Flour 
50g Sugar 
2g Salt
50g Water 
1 Egg 
40g Butter 

In a mixer fitted with a bread hook, add flour, yeast, sugar, egg and water. Start mixing at slow speed for 2 mins. Add salt and continue to knead until dough lifts from the wall of the mixing bowl. 

Add water roux mix and continue to knead for 3 mins. (speed 2)

Add butter and increasing kneading speed to speed 4.

Continue kneading for 15 mins on speed 4 until dough is no longer sticky and does not break when pulled to perform window test. 

Place dough in a slightly oiled bowl. Cover with cling wrap and leave to proof in a warm area for 45mins.

With lightly floured hands and table top, knead (6) to form a smooth round ball. Divide dough into 12 balls – about 40g each.

Roll each small ball into a round ball and leave to proof for 10mins.

Flatten each ball and roll out to a circle with a rolling pin. Place sambal ikan bilis filling in the center of the dough and wrap and seal the edges of the dough to form a ball. 

Leave to proof for 1 hour. 

Brush with egg white and decorate.

Bake at 185C for 8-10mins until brown.

Leave to cool.

September 5, 2015

Fig Galette

Dear A, 

The Turkish figs are back. They show up only once or twice a year as far as I can remember. My dream ritual of picking it myself-choose one, pretend to smell, and put it in basket-is so not going to happen here. Yes, they're imported, and they come in box, which I bought two. I have eight plump and purplish figs in my fridge, lie idling for almost a week. Hubs even made a complaint of having too many fruits in the fridge. Well, I’m hopeless when it comes to beautiful produce. I'm a whatever-nice-in-the-grocery hoarder. I buy and store them in my fridge/pantry and wait for the right moment to use it a.k.a near expiry date. Get some tips to make them last longer here. Anyway, I have nothing sprang on my mind for these figs. I turned them into tart few years ago, blogged, and that's about it. I think I prefer to have them as it is nowadays. Couple it with my oatmeals, or slice them up and threw it in my salad. Our house was due for HIP (House Improvement Project) inspection and some electrical work that day, and I wanted the house to smell nice when the guys come. Not the right guest but why not. I need something quick, and a galette is perfect. I'd like to think galette as a free-form of tart/pie. It's less tedious obviously, provided that the dough you're working with is not temperamental. The hot breeze of September would give me no help if I were to stick with my go-to pastry recipe. So I searched for a new one. And ended up with Deb’s site-Blueberry Galette recipe. I choose hers for its sour cream call (she used ricotta, but suggested to subs with yogurt/sour cream). I have about half tub of it, left from my last use. Her recipe is quick and that's one thing I love about it. Very easy to 'handle'. I froze it for merely 10 mins and it harden. Had to left it on my counter while searching for my rolling pin. Adam used it for his kitchen-play last week and didn’t put it back in the drawer. I searched and searched as the hot ambiance started to soften up my dough. I gave up and used a cup instead. And it worked. The dough was nearly back into its initial state, but it didn't stick on my fingers. Great. We have an hour of no fans, no wifi, no TV, etc. Yes, they shut down the main power off. As they did their job, I sat on my dining table, guiding Adam on his English exercise, while working out a piece of galette. Adam loves the crust but not so much on the filling. He's excited for the blueberries tho-I threw in a few just to get that pretty purple bursts. Refused for more when he bit just a tiny piece of fig. Hmmm. More for mommy then.  

More soon. 

Love, 

A


Pastry

1 1/4 cups (160 grams) all-purpose flour
1/2 teaspoon table salt
1 1/2 teaspoons granulated sugar
Zest of half a lemon
8 tablespoons (4 ounces or 113 grams) cold unsalted butter, cut into pieces
1/4 cup sour cream
3 tablespoons cold water

Filling

11/2 cups fig cuts
Few blueberries
3 to 4 tablespoons granulated sugar (use the lower amount if your fruit is especially sweet)
2 tablespoons cornstarch
Pinch of salt

Glaze

1 egg yolk beaten with 1 teaspoon water
1 heaped teaspoon coarse sugar for sprinkling

Make dough: 
Whisk the flour, salt, sugar and zest together in the bottom of a large bowl. Work the butter into the flour with your fingertips or a pastry blender until mixture resembles a coarse meal and the largest bits of butter are the size of tiny peas. Stir sour cream and 3 tablespoons water together in a small dish and pour into butter-flour mixture. Stir together with a flexible spatula as best as you can, then use your hands to knead the mixture into a rough, craggy ball. Wrap in plastic and flatten into a disc. Chill in the fridge for 1 hour or up to 48 hours, or you can quick-firm this in the freezer for 15 minutes.

Assemble galette: Heat oven to 200 C. On a floured counter, roll the dough out into a large round-ish shape, about 14 to 15 inches across. Download and print Deb's star shape template here. Cut the dough according to the template. Carefully stir together all of the filling ingredients and spread them in the center of the dough, leaving a 2-inch border. Fold each of the 5 corners into the center. Pinch the outer corners closed, to seal in the filling and the shape. Whisk egg yolk and water together and brush over exposed crust. Sprinkle with coarse sugar.

Bake galette: For 30 minutes, or golden all over. Remove from the oven and let stand for 5 minutes, then slide the galette onto a serving plate. Cut into wedges and serve hot, warm or at room temperature. Serve it with ice cream.

August 19, 2015

Buttermilk Cherry Smoothie


Dear A, 

I love buttermilk. I think it's a clever use of leftovers. You probably already know, but in case you don't, buttermilk is a milk-leftover after making butter. And contrary to its name, buttermilk is actually lower in fat than regular milk. And some says, lower than yogurt. There are two types of buttermilk, traditional and cultured. Traditional buttermilk refers to the by-product from churned butter while cultured buttermilk is a cow's milk fermented using lactic acid bacteria. That is what lined in most grocery shelves nowadays. Frankly, I never knew its existence until I moved here. That was 6 years ago. That long eh. It now graces my Sunday mornings, being the most loyal companion to my eggs, flour and sugar, and end up as fluffy pancakes on my plates. Adam loves them. I never knew buttermilk can be drunk straight as it is. I We only do yogurt drinks. Yes, I remember. They both are actually two different dairy products. Similar in taste, tangy, but buttermilk has this bitter after taste. As for the cherries, I wanted to make something with them, by something I mean galettes, tarts or a pound cake (high hopes!) but I simply had little time to make any bakings this week. No regrets though. The smoothie tastes so good. The sweetness of the cherries combined with the tang of the buttermilk made me had it in seconds. While the banana make it rich and satisfying. The recipe is from Bon Appetit, which requires only three ingredients-buttermilk, cherries and banana. Just combine 1/2 cup buttermilk, 1 cup pitted cherries, and 1 peeled ripe banana in a blender. Purée until smooth. Give it a try, will you?

Love,

A


August 5, 2015

Green Goddess Smoothie


Dear A, 

I have been planning to write you a letter for years now, but, the right moment never came for me to just sit down and write. Well, different case this morning though. A lovely grey weather outdoors, such a fine day to work at my new workspace and start typing. It's such a long time since we'd last spoken. I try to forget and go beyond those upsetting words to come to this. Life has many different chapters. One bad chapter in life, doesn't mean it's the end of the book. I really hope we could pick up right as we left off. Like nothing ever happen. Let's start with Raya. We went back to Penang for Raya this year. Tried catching up with our relatives there, went to every single Mami's house (we're busy with the kids, they're really getting old), had the best Mamak food 24 hrs a day, it's been food, food food...can you imagine? Exactly the same Penang routine we had when we were small. I gained like 4 kilos in few days time. Oh well. That explains the green smoothie. I shall have this every morning, and I shall be punished if I ever skip one. #mantra Hopefully I could lose those unwanted kilos by end of the month (or year?). Not if I keep on eating like a mad cow! I have been consuming this drink for almost two years now, on and off, unfortunately. It's called Green Glowing Green by Kimberly Synder, but I prefer to call it Green Goddess Smoothie or GGS. It was a major trend in Instagram years back. It was shared by my IG friend, whom I had a chance to meet during my Germany trip with mom last year. I'm not a big fan of following what's trend or not, but this one's definitely a good trend, so I succumbed. Verdict: probably one of the factor that successfully lowered down my cholesterol level. 

Here's the recipe in case you feel like trying.

GREEN GLOWING SMOOTHIE ( POPSUGAR)

INGREDIENTS

1 1/2 cups water
1 head organic romaine lettuce, chopped
3 to 4 stalks organic celery
1/2 head of a large bunch or 3/4 of a small bunch of spinach
1 organic apple, cored and chopped
1 organic pear, cored and chopped
1 organic banana
Juice of 1/2 fresh organic lemon
Optional: 1/3 bunch organic cilantro (stems OK) and 1/3 bunch organic parsley (stems OK)

DIRECTIONS

1. Add water and chopped head of romaine to blender. Blend at a low speed until smooth.
2. Add spinach, celery, apple, and pear, and blend at high speed.
3. Add cilantro and parsley (which help chelate heavy metals from your body).
4. Finish with banana and lemon.

I must go now. The kitchen floor is waiting to be mopped, the dish is still piling in the sink, and I got lunch to cook. More letters soon. 

With much love, 


September 10, 2014

Sardine on Toast


One of the easiest brunch you can make in no time at all. The idea is this; an open faced sandwich consists of wholegrain toast, topped with cucumber slices, half of sardine dipped with tomato sauce & caramelised onion, and garnished it with a small sprinkle of salt, chili flakes, red onion and coriander. It's my so-called take on the local's favourite, sardine and cucumber sandwich, which is basically mirrored on Shira Bocar's Sardine on Rye. Perfect for everyday. 

Sardine on Toast
Ingredients: 
2 slices wholegrain bread
Corn oil (for sautéing)
1/2 thinly sliced red onion
One small can of Ayam brand sardines, packed in tomato sauce
2 tablespoons fresh coriander
Salt and pepper
Lemon wedge

Heat your saute pan over medium heat. Sauté the red onion until slightly caramelised. Put the drained sardine in, and let it cook for a minute or two. Pour the tomato sauce in and leave it reduce a bit. 
To assemble the sandwich; Toast the bread. Top with sardines, red onion, coriander. Sprinkle with some chili flakes. Make sure you drizzle it with some lemon juice before you take it to your mouth- that's the key that bind everything together. You can swap in the chili flakes with the real hottie, the bird's eyes chili. AYOR.

August 14, 2014

Pandan Chiffon Cake (with real Pandan extract)


Old-fashioned, soft and aromatic. 

Nigel Slater once wrote, "A single 'a' changes everything"-well, he was talking about getting a good custard with an easy addition of a single, or two ingredients though, but I could not agree more. Well, in my case, the 'a' means nothing more than swapping the usual pandan paste with the real pandan extract. Trust me, it brings a huge different to the whole awesomeness of this cake. I literally gobbled up four big chunks in a row. Ouch. I am sorry if you read this from any other parts of the world where pandan is gold. But if you are in SEA region, by all means, please use the real pandan extract. :)  

Pandan Chiffon Cake 
Recipe from The Little Teochew, original recipe from Indochine Kitchen
Make 1 cake, 22 cm in diameter, 8 cm tall. 
You need a 22-cm chiffon cake tin for this.

Ingredients A
7 egg yolks
75g coconut milk- I used freshly squeezed coconut milk. You can opt for fresh pasteurised coconut milk. Do not use packet coconut cream (Kara or Ayam Brand) because it's too rich. Your cake will spring out out of the pan while cooling.
Concentrated fresh pandan extract- I used 30 fresh pandan leaves + 1/2 cup water and blitzed in a food processor. Squeeze out the juice from the pulp and leave it in a glass overnight in the fridge. Use only the green stuff that settles at the bottom of the glass. Wendy of Table of 2.. or more shows us how it's done here. 4g or 1 tsp if you are using pandan essence.
150g flour
4g baking powder-1 scant tsp
95g sugar-can reduce to 75g
3g salt
83g vegetable oil-it's about 83ml

Ingredients B
- 7 egg whites
- 100 g sugar

Preheat oven to 160°C.
Combine egg yolks, coconut milk and pandan extract in a mixing bowl. 
Sift flour, baking powder and salt. 
Add flour mixture and sugar into the bowl. 
Add vegetable oil and whisk everything to combine.
In a separate and clean bowl, beat egg whites and sugar together till it forms soft peaks.
Slowly fold egg white into egg yolk mixture in 3-4 additions.
Pour cake mixture into an ungreased tube pan.
Bake for 45 minutes.
Flip the pan upside down against a bottle on kitchen counter.
Let cool for 25-30 minutes. 
Loosen side of cake with a knife. Eat!