October 19, 2012

My first Rainbow Cake and etc.


Ya, pinggan hijau tu sumbing sket. Dah ambik gambar baru perasan. Kih kih :P

The recipe is based on the original Hummingbird Bakery's Vanilla cupcake, where the recipe said that it would yield 12 cupcakes, but in my case it gave me enough batter to make 2 layers (8x8 pan) of the rainbow cake-Yerp, I made a squarish rainbow cake. I had to re-double the recipe to get the cake done. 

I believed this is the best vanilla cake I've ever made, so far. The intensity of the vanilla is unbelievably amazing, texture-wise-moist and fluffy. Everything is perfect but I think the frosting could use a little less sugar and orange zest than the recipe calls for. The zesty taste is covering the whole vanilla taste, what's the point kan? 

It took me 2 days to finish the whole cake- I'm still in packing, labelling, and throwing mode, remember? Husband is currently away for another business trip and I'm doing all the packing. Yeay, I got to throw his old stuffs. Karang guni betul. And just an hour to assemble the layers and turn it into a beautiful rainbow cake. I can't believe my dream of making this cake have finally come true...

okay, I better get back to my boxes..they are screaming for me..argh.

PS: . We're going to be so busy next couple of month, with renovation works, blah2..so I think this would probably be my last post for this year. La Kitchen will be continued as usual on January. Apologize for that. No internet connection, while mobile blogging is so not me. Tak best. 

....and I'm taking order for this rainbow cake too.. sms/whatsapp me at 965-818-69 :D


The Rainbow Cake 
(based on HUmmingbird Bakery's Vanilla cupcake recipe via here)
19/6/2014: I have update the original recipe by doubling it. You don't have to double it coz below recipe is enough to make a 7" rainbow cake. This is the easiest cake ever!
All you need is:

5- 7"x7" baking pan (don't worry if yo only have two pans, you can bake the first two layer, then continue doing so until the batter finish)

2 cup all-purpose flour
11/2 cup sugar (I reduced it to 11/4cup)
3 tsp baking powder (I had to double the original recipe and end with that number)
1/4 pinch salt
6 tbsp butter
1 cup milk
2 egg
2 tsp vanilla extract

Put the flour, sugar, baking powder, salt and butter in a mixing bowl and beat on slow speed until everything is combined and you have a crumb mixture with a sandy consistency. Gradually pour in half the milk and beat just until the milk is incorporated.

Whisk together the remaining milk, egg and vanilla. Pour into the flour mixture and beat until all ingredients are just incorporated. Beat for another 30 seconds until batter is smooth. Do not overmix.

Divide batter into 5 cups, or 7 (I've done it before), and put your desired food colouring in each bowl. 

Divide batter amongst 5 7"x7" baking pans and bake at 325F (163 C) for about 15 to 20 minutes or until a skewer inserted in the centre comes out mostly clean. Cool before frosting.

Creamy Cream Cheese Frosting
I love this recipe for frosting. It never failed me. It's creamy, not too sweet and a bit salty :D 

250g salted butter -I used SCS
225g unsalted butter- "
1/4 fine sugar
2 blocks of Philadelphia Cream Cheese
1/4 confectioners sugar
1 tsp of milk

Beat butter and sugar until it doubles its size and creamy.
Cut the cheese into small cubes and add them one by one the butter mixture while beating them in medium speed.
Add the confectioners sugar and milk. Mix well. Taste. Add more confectioners sugar if you like it sweeter. :)

October 9, 2012

Cream of Mushroom Soup

Hello. I'm so sorry for the prolonged absence, but here I am now, with a bowl of mushroom soup for you :) Honestly, it was Instagram..Yep, apparently, Facebook, Twitter, Pinterest, Google+ are not enough for me T_T. Plus, the season of all sickness was here as well, fever and the gang, stomach flu, followed by episodes of throwing up..phew~ but we are okay now.. 
But, again, most of the blame goes to Instagram. It has that on the go thing, which is more convenient than blogging. I don't have to set up my tripod and camera, and spent hours doing the clicking, editing and writing. 

But naah...don't get me wrong, I love spending hours doing all the said jobs, it's just that time is not on my side..and I always have more important jobs to tend to. i.e. laundry, cooking, 'drama class' with Adam and other endless domestic tasks that doesn't deserved any highlight. Nyah kau.
We are starting to get busy with our house renovation and everything needs to be finalized by this month. Lots of stuff to be boxed, labeled, and thrown away... yikes Honestly, I haven't start on anything yet except throwing out some unwanted old make up stuffs from my dresser...he he Well, that's a good start, right... 
The renovation will starts as soon as Husband takes off for Germany next month. Another business trip for him. We are supposed to follow, but the trip had to be postpone until next summer :( It's the renovation works. I need to be here to supervise them.

The other main reason is the weather. The last time we went to Europe was 2 year ago, and it was super cold. The predicted temps for Germany and Paris are about +/-5 degrees C. November in Paris is going to be rainy and chilly. Did you remember our Korea trip last year? The one where Adam refused to wear his coldwear. Scary kalau dia buat hal macam tu lagi. T_T So with that, I think it's better for us to postpone it to next summer. 6-7 months away je pun. :P 

Okay, let's move on to the soup. This is the best mushroom soup I've ever made. Period. The soup is a perfect balance of velvety creamy and intensely mushroomy taste, with subtle hint of herbs at the end. Everybody in the house digged it. I paired it with garlic bread and it was epic! The recipe is from Smitten Kitchen's Balthazar's Cream of Mushroom Soup. So here's my version of it.

Cream of Mushroom
Adapted from Smitten Kitchen

What you'll need:

30 g of dried mushroom -I used dried premium shiitake
3 cups of hot water
1/4 cup of olive oil
Instead of using fresh herb, I chose to use a teaspoon of Tuscan dried herbs (consists of rosemary and parsley)
1 medium onion, diced
2 cloves of garlic, minced
500g of fresh shiitake, sliced or diced.
2 cups of chicken stock + 1 cup of hot water + knorr chicken cube
1 cup heavy cream
2 tablespoon butter
Salt and ground pepper to taste

Way of doing it: 

Soak the dry mushrooms in 3 cup of warm water for 20 to 30 minutes, until plump. Strain the soaking liquid through a coffee filter to remove grit and reserve, along with the reconstituted mushrooms, until needed.

Heat the olive oil in a large pot over a medium flame. When the oil is hot, add the onion, garlic, salt and pepper and cook for 5 minutes, until the onion is soft and translucent but not brown. then add in the dried herbs.

Turn the flame to high and add shiitakes Cook for 10 minutes, during which the mushrooms will give off their liquid (which should evaporate quickly due to the high heat) and deflate significantly. Stir occasionally.

Add the chicken stock and the dried mushrooms along with the soaking water.Simmer for 30 minutes. Then add the cream and butter. Working in batches, puree the soup in a blender until smooth. Return to the pot and keep at a very low simmer until ready to serve.

Oh btw, I'm in the mid of renovating this blog as well.. and as you can see, the disqus comment area is invisible right now, due to its font color. I'm trying to fix it right now. You can leave comment as usual. :) 

September 7, 2012

Selamat Hari Raya, Maaf Zahir Batin and Pineapple "Tulip" Tart Tutorial ;P

Last year, I told myself I wasn't going to make any Eid cookies this year. Read here whyIt's hard, I thought. But I've got to be firm with my decision.. I managed to keep my hands off the oven for the first two weeks. Then, somewhere in the middle of Ramadhan, my mom told me that she rather have me baking her cookies than spending $$ on tunjuk2 cookies. Yeay! I got the chance to bake like everyone else. :D

Well, I dont't have trouble making my mom's order despite the time I had in my hand during that last week huhu I managed to find time and made 5 types of cookies and 3 layer cakes for my mom and my relatives here (not to mention the baking orders). Most of the cookies are simple, i.e. cornflakes cookies and that freezer cookies, so no supermom or superbaker badge for that..The only cookies that took a lot of my time was the Pineapple Tulip Tart. 

You see..I sort of promised some of you guys that I would put up a step by step entry on how to do this Tulip Tart- I received few emails for that only. I wanted to upload this entry sooner, but you know me..hihi I'm the biggest procrastinator in the WWWeb :P So I managed to squeezed some time {finally} and make this step by step for those who asking. 

First and foremost, let me remind you that this is my way of doing it. I'm not sure whether there are any right tools/ shorter ways of doing it. This method of mine is time-consuming and it needs lot of patience and U-tube movies-so you can save yourself from boredom while doing it. It took me 4 hours to shape the tart ONLY and I ONLY get 100 pieces out of that 4 hours-I layan 3 idiots (movie) :P So think twice before you want to embark on this Tulip Tart journey. I did this once before(here) and this year I made some for my mom and SIL. This year's wasnt pretty as the last 2 years since I somehow running out of time :P So here it is. 

Note: I used Kak Fida's Cream Cheese Pineapple Tart as dough.Nyum!
Psst..sorry for the low quality photos..taken with my iPhone coz I really don't have much time to set up my camera that day.. huhu 

August 17, 2012

Red Velvet Swirl Cheesecake Brownies

Last 2 weeks were a bit of emotional roller coaster ride for me. We had been receiving a lot of highs, and I guess it's time for us to hit the sudden lows. I did a lil bit of crying, yes, call me a crybaby, but that's one h*ll of a way to let my frustration out. Things had happened..nasi dah jadi bubur..There's no point crying over split milk..blah blah blah... That's why I decided to go under the radar for a while. 

But things are O-K for now, even though there are still nitty gritty bit and pieces that need to be sort out. I'm slowly accepting reality of the new order and digesting it bit by bit. All thanks to Ramadhan treats-spiritually said and those sweet nyum nyum desserts (gulp).

Alhamdulilah.. I'm glad it happened during Ramadhan- so no "shaitonirajim" to complex the already complicated situation huhu. I just hope that everything that we planned will go smoothly and the big bomb that just hit us is a blessing in disguise. Amiin.
So back to the food world..Who's up for some red velvet cheesecake brownies? FYI, this is one of my most repeatable recipes ever. I've made them 5 times before and am loving it. The cake was ordered by Adam's school teacher and she ordered two of them! The bottom part is a red velvet bar covered with slab of creamy cheese on top and decorated with red swirls. Yummy! 
So, as you can see, I'm starting to take orders now. Drop me an email if you feel like to order this Red Velvet Swirl cheesecake Brownies(For your Raya open house perhaps?) I won't be around next week tho, so any order must be placed after 27th Aug 2007. Apart from that, I also received THE Ginger-Citrus Carrot Cake order. Take a look at it here :)

Raya cookies will be update on my next entry huhu  

Recipe is taken from here.

July 31, 2012

Sigh


Life is uncertain. Eat dessert first. ~Ernestine Ulmer 

July 28, 2012

Strawberry White Chocolate Mousse with Pocky Chocolate Cage and that Gotye song...

By now, I know that most of you are probably familiar with the haunted Gotye's song, Somebody that I've Used to Know. If you haven't heard of it yet, click here. The other day, when I played the song in the car, Adam immediately turned to me and said, "Baa Baa Black Sheep". Huh. His Daddy instantly agreed with him.

You see, I hate to admit it but I'm tone deaf. It's a bit hard for me to notice similarities between those 2 songs. I had to put that song on repeat, and finally..yes, the melody does sound like the nursery rhyme. It's sort of "Baa Baa Black Sheep" parody or something ha ha So much of Luiz Bonfá-inspired eh :P

Anyway, this is our Iftar dessert for today. Strawberry White Chocolate mousse. I added some Pocky sticks to make it looks like my previous Pocky Chocolate Cage dessert. However, the outcome is too sweet for my liking. Perhaps I should add a layer of dark chocolate to balance out the sweetness next time. BTW, I halved the recipe and got 4 small glasses out of it. 

Okay, I'm out..London 2012 opening ceremony is starting any seconds now. Happy Weekend peeps!

Strawberry White Chocolate Mousse Recipe
Recipe adapted from SimplyRecipes
Deco inspired from my previous post, Pocky Chocolate Cage
Serves 6-8


Ingredients:
1 ½ pounds of strawberries
2 Tbsp fresh lemon juice, divided
8 ounces white chocolate, finely chopped
1 ¼ teaspoon unflavored gelatin (about half a small envelope)
2 cups heavy cream
2 Tbsp powdered (confectioner's) sugar

Method

Clean and hull the strawberries. Starting with about halfof the strawberries (3/4 pound), quarter them and purée them in either a blender or food processor. Then press the purée mixture through a fine sieve into a bowl. You want to end up with 1 cup of purée. Stir in 1 Tbsp of the lemon juice and set aside. With the remaining 3/4 pound or so of berries, slice as many as to fill up 2 cups, and set aside.

Melt white chocolate in a double boiler, or a stainless steel bowl set over simmering water (make sure the simmering water doesn't actually touch the bottom of the bowl.) Stir until smooth, set aside.

Put ¼ cup of cool water into a small bowl. Sprinkle the gelatin powder over the water and let sit for 5 minutes.

Stir ¼ cup of the cream and the 2 Tbsp of powdered sugar in a small saucepan, bring to a simmer over medium heat. Add the gelatin mixture and stir until the gelatin has dissolved. Pour into the bowl of melted chocolate, and stir until smooth. Whisk in 3/4 cup of the strawberry purée. Reserve the remaining ¼ cup of purée.

Using an electric mixer, whip the remaining 1 3/4 cup of cream. (Note I usually use a blender to whip cream, but in this case an electric mixer or hand beater is preferred, you have better control over the amount of whipping.) Beat on medium-high speed until medium peaks form. Whisk one third of the whipped cream into the chocolate mixture. Using a large rubber spatula, gently fold the remaining whipped cream into the mixture. Refrigerate for 1 hour.

Stir the remaining 1 Tbsp of lemon juice into the reserved sliced berries. Fold the sliced berries into the mousse. Spoon mousse into serving cups and refrigerate for at least another hour, preferably several hours, or even over night (cover with plastic wrap).

When you are read to serve the mousse, pour a dollop of the reserved strawberry purée onto each serving. Add a few slices of strawberries as garnish
.

July 25, 2012

Tandoori Kebabs

I knew I had to share the recipe the second I had my first bite on it. And that second happened a year ago :P After several trays were out from my oven...after dozens of sticks were used...and after bottles of spices gone. Well, better late than never, right?

I normally use chicken parts, but this time I turned them into kebabs by using boneless chicken thighs. You can use chicken breasts if you want to. I find them tasteless and plain. huhu 

So here's recipe. It's totally a keeper.:) Psst..I sprinkled too much dried mint on the kebabs in the last photo. Thus the dry look. Trust me, it's not.

Chicken Tandoori
Based on recipe taken from Tina of My Domestic Bliss. The original recipe was translated from Mat Gebu blog, Dapur Tanpa Sempadan. 

Ingredient A
500 grams chicken pieces
3 tablespoons fresh lemon juice
1 1/2 teaspoon salt
1/4 teaspoon tumeric powder

Ingredient B
1/2 cup plain yogurt
1 1/4 teaspoon coriander powder
1/4 teaspoon cumin powder
1/2 teaspoon paprika
red colouring (optional)
Ingredient C
1 inch ginger
3 cloves garlic
1 red chillie
1/2 tablespoon cooking oil
slices of lime

Method:
RC Note: To make tandoori kebabs, cut boneless chicken thighs into medium small sizes and then follow the rest of the instruction below. 

In a large bowl, add lemon juice, salt and tumeric powder to chicken pieces. Marinate for 15 minutes.

Meanwhile pound Ingredient C with mortar and pestle and add them to a bowl filled with Ingredient B. Mix B and C together. Add B and C mixture to the bowl of chicken and marinate further for 30 minutes.

Put them on the oven grill and brush some cooking oil. Bake at 200C until done. 

Jump to Tina's blog for the mint sauce recipe. 

July 24, 2012

Bubur Pulut Hitam a.k.a Black Glutinous Rice Dessert

Ramadhan is here, and my energy for cooking and baking has finally been renewed. he he Hopefully, I'll get to rejuvenate in other aspects too, physically and spiritually.. Amin.
Our first day of fasting was a bliss. I felt calmer and miraculously energetic than before. Or, at least for the past 2 days. We still have 26 days to go! :P We tapau some food from Geylang Bazaar that day. Nothing new, just the same old food.
I just realized that I haven't told you about our new home yet.. We've been waiting for nearly three years, and the key is finally around the corner now. And with that, our normal weekend routine has been shifted to ID appointments, home tours and suppliers warehouse visit routines. We are in the mid of ID selection process, in fact, we already 'chose' one particular ID that we think suit our need, and by that, I mean workmanship and budget. We haven't signed on anything yet though. Still waiting for our keys.. theeee...I can't wait for that moment to happen-getting keys and start with the renovation works. We already have some idea on how to bejewel our little home to make it looks nice and cozy. To us, at least. 
Okay let's talk food. I think this was the first Black Glutinous Rice dessert I've made in SG. It was second to the last same dessert I've made in KL, before I moved to SG for good. To me, Bubur Pulut Hitam, or Black Glutinous Rice dessert is notably synonym with Ramadhan. The same goes with the rest of the bubur clan; mung bean dessert, bubur chacha (sweet potato dessert, red bean dessert, just to name a few. Not sure why though. 
As for the taste, it was good, no wait, it was incredibly good! and I have plans to make it again soon. He He 

The main dish for the second Iftar is Tandoori Kebabs- recipe will be upload in my next entry. I paired the kebabs with butter rice and leftover parpu from sahur. I know..I know..parpu and kebabs are not match made in heaven but why let good food go to waste. One of my goals for this month is not to waste food. That is after I read too many Ramadhan flyers that keep reminding me of those poor and hungry Somali kids. :'(
Can you imagine fasting without sahur and Iftar for days/weeks...isk isk My prayers will always be with them. 


source: Saiful Apek Statigram
Note: Strolling the food isle in Pasar Ramadhan is less torturing if you keep those Somali people faces in mind. It's okay to buy, but please don't waste.

Bubur Pulut Hitam or Black Glutinous Rice dessert 
Loosely adapted from A Table For Two. TQ!
Serving 4-6

Ingredients

  1. one cup of black glutinous rice
  2. 1/2 cup of Palm Sugar (Gula Melaka)-I used brown sugar.
  3. 10 tablespoon of white sugar
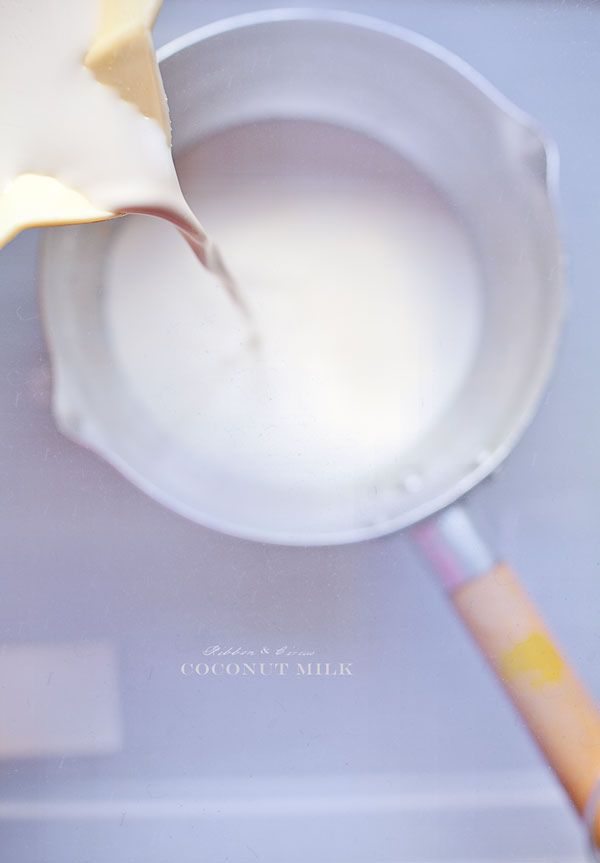
  4. 1 can of Coconut Cream-I used coconut milk and cooked them with a little of sugar and salt
  5. 1 cup water or more
  6. Screwpine leaves- I added

Method
  1. Roast the black glutinous rice in a frying pan on high heat. By doing this, it will release the nutty aroma of the rice. When the rice is dancing in the pan, it is ready.
  2. Put the roasted rice into a pot, wash and rinse thoroughly.
  3. Fill half the pot with water, cook over high heat.
  4. Once the water is boiling, turn the heat down to medium and keep stirring every 15 mins or so to prevent the rice sticking to the bottom and burned. During cooking, the water will be reduced and getting thicker, add more water when it becomes too dry and continue cooking.(tips below)
  5. Cook until the rice is soft and mushy. (usually takes around 2 or 3 hrs at least)-I used cast iron pot and it took me about 1 hr +/- to finish cooking. 
  6. Add palm sugar, stir until dissolved.-I used brown sugar..
  7. Add white sugar to taste, stir until dissolved.
  8. Once ready, remove from heat.
  9. Pour the porridge into a small bowl, add a few spoonful of coconut cream on top.- I added the cooked coconut milk on top. 
  10. Ready to serve hot, enjoy!-Let it cold in room temp, store it in fridge after that. I enjoy it cold.. :)
Pssst..I know I've said something about uploading Adam Birthday cakes photos today. But I'm sorry to tell you that it's not going to happen. Most of the photo was not with us, if you get what I mean. Bad angles and under-exposed. Isk. I can't even fix it with editing :P I guess we'll have to bare with that not-so-good-but-not-so-bad-either instagram photo here.  

July 22, 2012

Down the memory lane: Happy Birthday Adam!


Finally, I got some time to sit down and update! :P 
And here's to Adam. Happy Birthday! :)
20th of July 2009-The day he was born. That's his birth video, and yes, through C-sect. 
His first hour of life. 
Day 3: We were still in hospital, learning how to BF, bathing, massaging him and whatnot.
First mommy-son moment...
Day 4
First day at home.
First jap, followed by his first fever.. huhu
In his crib.
OTW to nursery...
thee..
First jeans!
eyes
Our Second anniversary dinner.. Adam @ 2 months +
First phewit :P
At 3 months old. 
His first flip!
Followed with proud smile :P
Aqiqah day@5 months
Rocking Elmo.. he he @6 month.. we finally moved to SG for good. 
Hello! :D
@7 months old
His curly hair started to grow.
Our first so called picnic.
First haircut! 
First shoes..fancy..I know :P @13 months..
Picnic!
First cry shot!
First attempt!
His Darth Vader moment :P
Rise and shine ppl!
Dinosaur cake 
Cakk!
Second Raya! He was 3 months old when he had his first raya.. x count he he 
Third Raya! ha ha baju recycled!
First fireworks!
Wabbit!
My fav shot! :)
His first bike!
First MRT ride! :p
Oucha!
The hair.
Korea-First oversea trip.
New iPad!
Nah..
Peeping Adam
First badminton session!
First fall!

Favorite ride @zoo
Falisha
Terrer sket :P
Pose!
Sharp bend..
Port Dickson
Third birthday! :D 
Birthday Donuts 'cake' for his friends at playschool. KrispyKreme copycat donuts from here
 Chocolate cake with Peanut butter Frosting for his birthday party at home :) Recipe from K.Rima's. I'll upload better pic of the cakes soon..

To Adam, you are the apple of our eye and our biggest bundle of happiness. Your existence has given my life a meaning and a purpose-you're the reason I get out of the bed everyday! You make us so happy and proud with every single things you do. May you have a great year and glorious life ahead. We love you, Adam. Happy Birthday!